Setting up Intercomm system using Raspberry Pi and Softphone
Jump to navigation
Jump to search
In this tutorial, we are going to setup an home/office intercom system that allows voice communication over a wireless LAN network using Mumble Server running on the raspberry pi and any softphone to connect to the server.
Table of Contents
[#x-Prerequisites. Prerequisites.]
[#x-Hardware. Hardware.]
[#x-Steps. Steps.]
3. Configure the mumble server:
4. Select "<Yes>" to auto-start mumble server whenever the Raspberry Pi boots up:
5. Make the mumble-server to be a high-priority app. That means, when there are many processes running on the pi, the mumble server should have a high priority. Select "<Yes>":

6. Set a password for the server and select "<Ok>":
7. To get the IP Address of the Raspberry Pi on the LAN, type the following command:
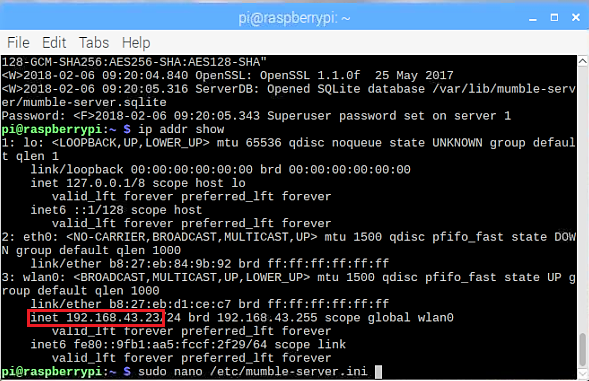 The octet numbers immediately after the "inet" is the IP Address of the Raspberry Pi. In this Case, it is 192.168.43.23
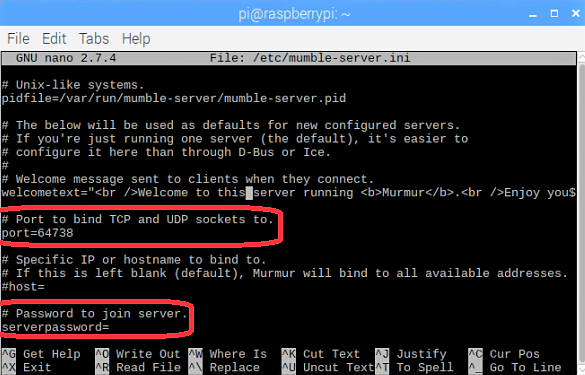
8. Edit the configuration file of the mumble-server using the "nano" text editor:
9. Take note of the port and set the server password here. Also, you can configure other settings by reading the comments and making the necessary changes that suit you:
10. Restart the mumble-server service:

The mumble server has now been setup on the raspberry pi. To connect multiple users to this server and setup an intercom, we need a softphone (software telephone). Another raspberry pi can be configured to be used as a softphone.
In this tutorial, we are going to use a windows and an android softphone to create the intercom.
11. Download the mumble client windows application to a windows PC from https://www.mumble.com/
You can choose either the windows version for PC or the MAC version for IOS, or the Linux version. In this tutorial, we would be using the windows version.
For the Android mumble client, download plumble from the google playstore for free.
12. After downloading the mumble client on the PC, follow the prompts to configure the client. Follow through all the steps to have the client properly set up so that the client is able to filter out noise (to some extent).
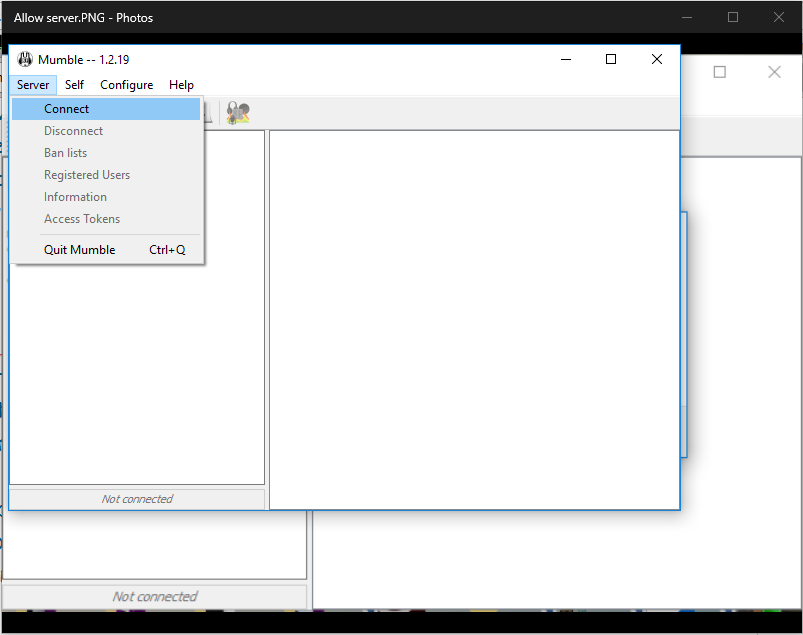
13. You can create a new client server. click on "server" on the left-hand top corner and click connect:
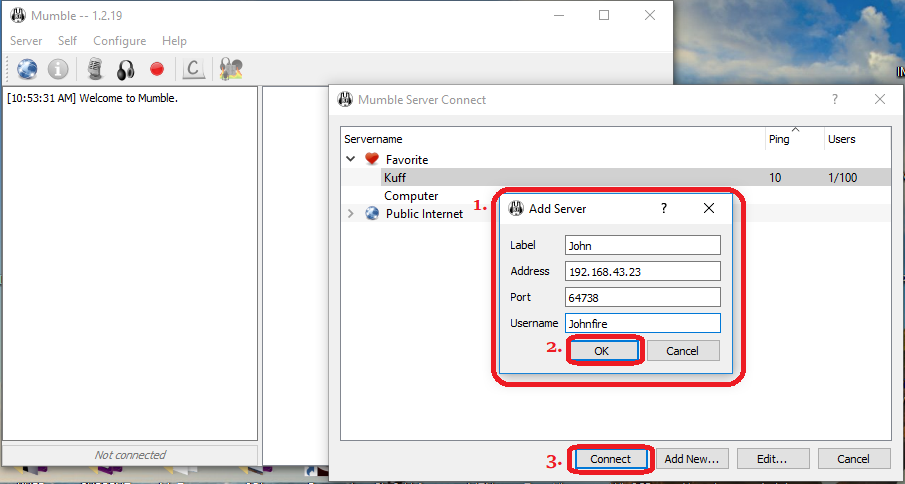
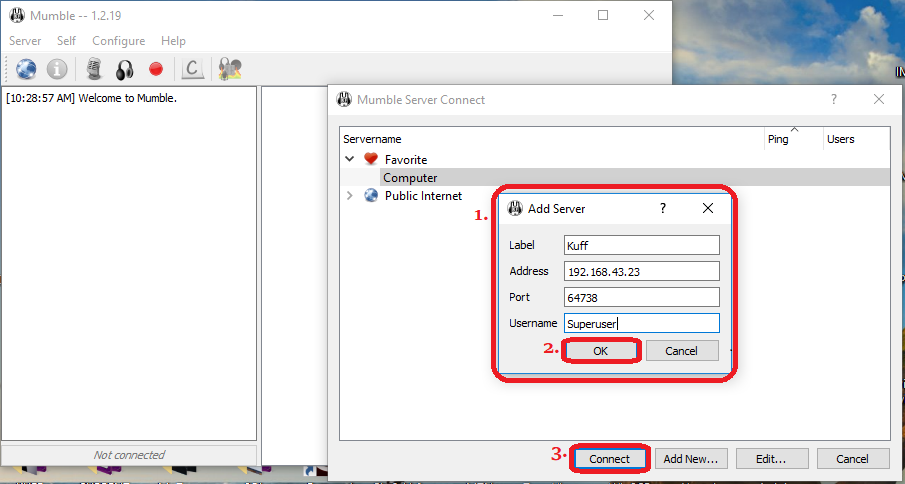
 14. Click on "Add New..." to add the credentials of the new client server:

15. Choose any label, for the address, type the IP Address of the Raspberry Pi which was obtained in step 7. In this case, it is 192.168.43.23. It is not always this exact IP Address; be sure to obtain the correct IP address as stated in step 7. Set a username (how you would be seen in the network). Then click "Ök" and "Connect":
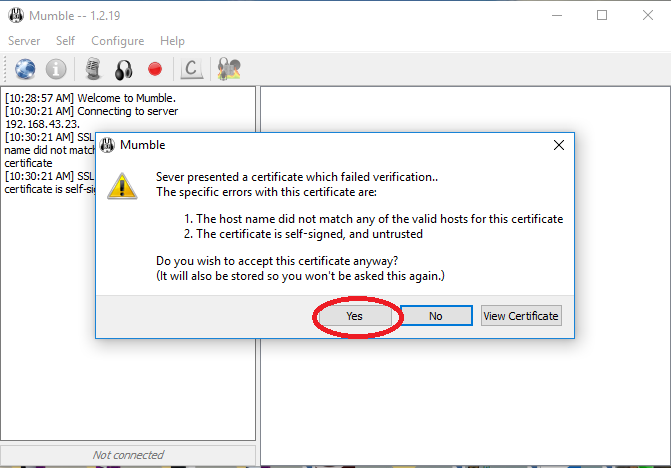
16. If prompted, select "Yes" to allow the certificate of the server:
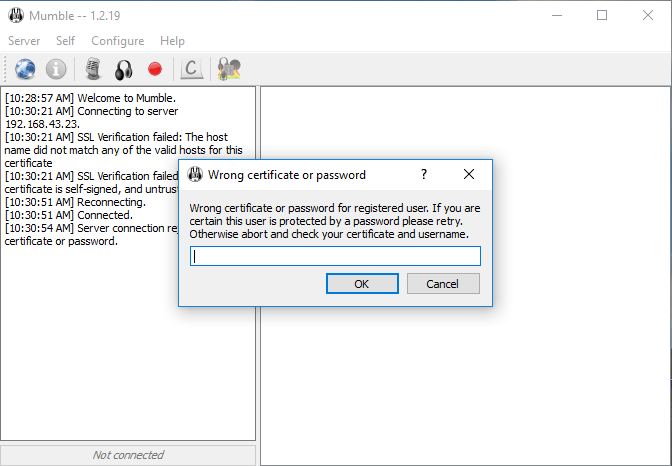
17. To create channels (i.e. a group for specific users only, for example a network of all the rooms in home), you need to log in with "SuperUser" as the username:
18. When prompted, input the password of the server which was set in step 6:
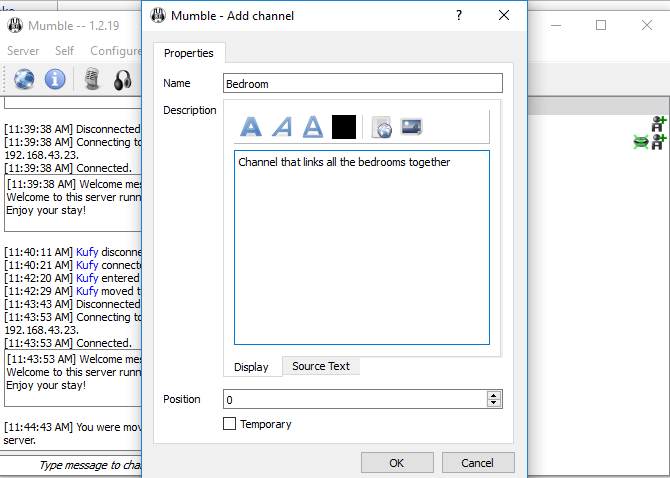
19. Now, you are logged in as a SuperUser. Right-click on the "Root" and select "Add":
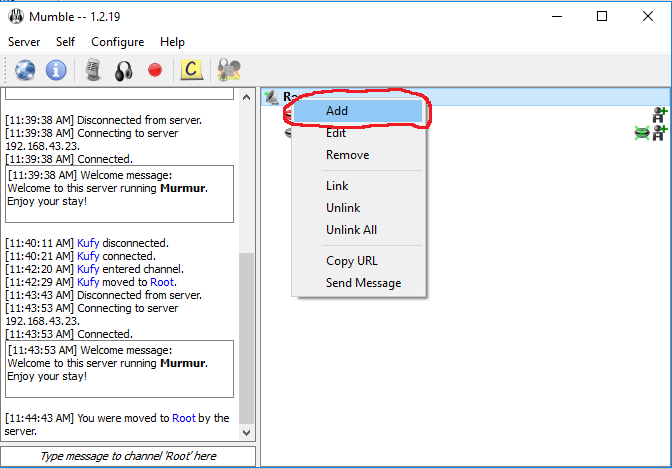
19. Name the Channel and add a description, then select "Ok" to create the channel. In this example, a channel named "Bedroom" has been create to link all the rooms together.
20. The new channel has now been created. Download the mumble client on other devices and connect to the mumble server by following the steps stated above.
For Android, download Plumble client, make sure you are connected to the network which the raspberry pi is connected to.
Add the credentials and connect to the network.
It is possible to connect to users all over the world through the internet. This can be achieved by port-forwarding the router and opening the mumble port, in this case, 64738.
To learn more about voice over internet and mumble, click here
For FAQ about Mumble, click here
Prerequisites.
Click here to learn how to write an OS on an SD Card for the Raspberry Pi.
Hardware.
- Raspberry Pi 3
- 8 GB micro SD Card
- Power Adapter
- 3.5 mm jack speaker
- USB microphone
Steps.
1. update and upgrade the Raspberry Pi OS:

$ sudo apt-get install update
$ sudo apt-get install upgrade
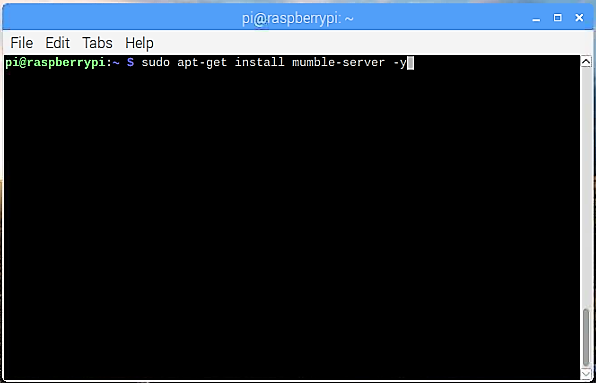
2. Install the mumble server:
$ sudo apt-get install mumble-server

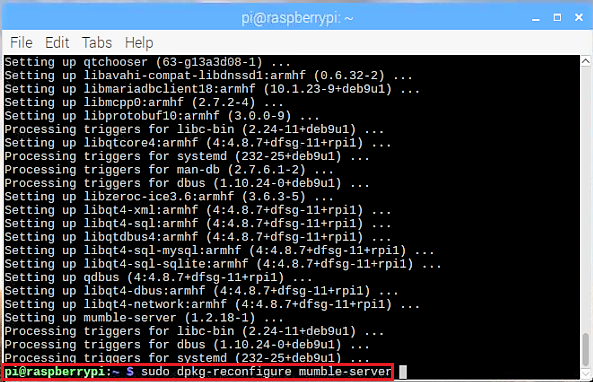
3. Configure the mumble server:
$ sudo dpkg-reconfigure mumble-server

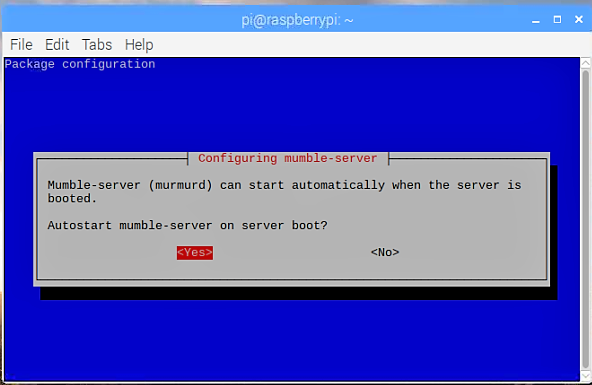
4. Select "<Yes>" to auto-start mumble server whenever the Raspberry Pi boots up:

5. Make the mumble-server to be a high-priority app. That means, when there are many processes running on the pi, the mumble server should have a high priority. Select "<Yes>":

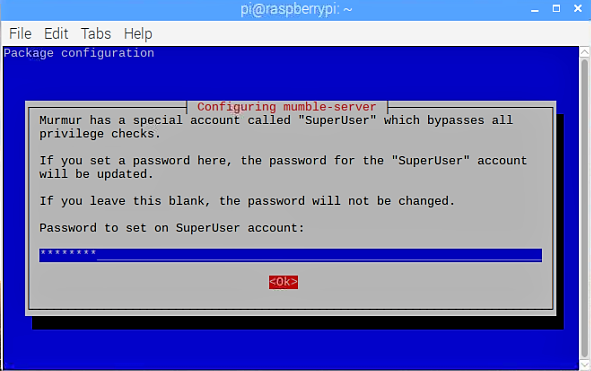
6. Set a password for the server and select "<Ok>":

7. To get the IP Address of the Raspberry Pi on the LAN, type the following command:
$ ip addr show
 The octet numbers immediately after the "inet" is the IP Address of the Raspberry Pi. In this Case, it is 192.168.43.23
8. Edit the configuration file of the mumble-server using the "nano" text editor:
$ sudo nano /etc/mumble-server.ini
9. Take note of the port and set the server password here. Also, you can configure other settings by reading the comments and making the necessary changes that suit you:

10. Restart the mumble-server service:
$ sudo /etc/init.d/mumble-server restart

The mumble server has now been setup on the raspberry pi. To connect multiple users to this server and setup an intercom, we need a softphone (software telephone). Another raspberry pi can be configured to be used as a softphone.
In this tutorial, we are going to use a windows and an android softphone to create the intercom.
11. Download the mumble client windows application to a windows PC from https://www.mumble.com/
You can choose either the windows version for PC or the MAC version for IOS, or the Linux version. In this tutorial, we would be using the windows version.
For the Android mumble client, download plumble from the google playstore for free.
12. After downloading the mumble client on the PC, follow the prompts to configure the client. Follow through all the steps to have the client properly set up so that the client is able to filter out noise (to some extent).
13. You can create a new client server. click on "server" on the left-hand top corner and click connect:
 14. Click on "Add New..." to add the credentials of the new client server:
15. Choose any label, for the address, type the IP Address of the Raspberry Pi which was obtained in step 7. In this case, it is 192.168.43.23. It is not always this exact IP Address; be sure to obtain the correct IP address as stated in step 7. Set a username (how you would be seen in the network). Then click "Ök" and "Connect":

16. If prompted, select "Yes" to allow the certificate of the server:

17. To create channels (i.e. a group for specific users only, for example a network of all the rooms in home), you need to log in with "SuperUser" as the username:

18. When prompted, input the password of the server which was set in step 6:

19. Now, you are logged in as a SuperUser. Right-click on the "Root" and select "Add":

19. Name the Channel and add a description, then select "Ok" to create the channel. In this example, a channel named "Bedroom" has been create to link all the rooms together.

20. The new channel has now been created. Download the mumble client on other devices and connect to the mumble server by following the steps stated above.
For Android, download Plumble client, make sure you are connected to the network which the raspberry pi is connected to.
Add the credentials and connect to the network.
It is possible to connect to users all over the world through the internet. This can be achieved by port-forwarding the router and opening the mumble port, in this case, 64738.
To learn more about voice over internet and mumble, click here
For FAQ about Mumble, click here