ArduinoInstall-MAC
Arduino Install How-To for MAC-OS
Arduino Installation is somewhat different on the MAC than a Windows machine. It has changed somewhat with the new 1.8.11 version, so follow the details below.
First get the latest MAC OSX version from the Arduino website HERE NOTE: This is a newer version called 1.8.10 (or later) which adds support for the newest Arduinos. Some old libraries do not work with it. If you're using the YourDuino Starter Sets you don't have to worry about this.
NOTE: You do not have to donate to Arduino... we have done that. When the download is finished, double click the .zip file. This will expand the Arduino application. Copy the Arduino application into the Applications folder (or elsewhere on your computer).
If you're using an Arduino Uno or YourDuino RoboRED (As supplied in YourDuino Kits) or Mega 2560, you don't have any drivers to install. Skip ahead to the next step below: Connecting your YourDuino / Arduino board:
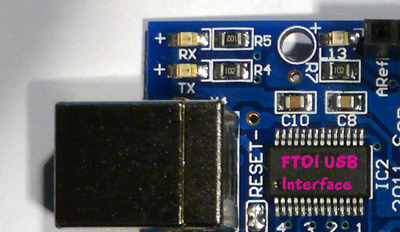
If you have an Older YourDuinoRobo1 or 328 or Mega1280 or a Nano, it will have a FTDI driver chip that looks like this photo below:

Note the rectangular chip. Newer UNO and Mega2560 Arduinos have a smaller square chip here.
So, IF you have that FTDI Interface THEN you need to install the MAC drivers for it. Get the MAC drivers HERE) Save that file somewhere and double-click it. It will guide you through installation. After that is successful, Restart your MAC (Click the upper left Apple and Restart). Then continue below.
Connecting your YourDuino / Arduino board:
Once you're back, get the USB Cable that came with your YourDuino or Arduino board, and plug one end into the board and the other end into your MAC. The POWER LED should light up. (It could be RED, it could be GREEN, no use being In Between). If you have a Arduino Uno or YourDuino RoboRED or Arduino Mega 2560, a popup box will appear telling you that a new network interface has been detected. Click "Network Preferences...", and when it opens, simply click "Apply". The Uno or YourDuino RoboRED or Mega 2560 will show up as "Not Configured", but it's working properly. Quit the "System Preferences" box if it is shown.
Run the Arduino Software
Start up the "Arduino IDE" application by clicking the desktop icon. Now you need to tell the MAC two things that it doesn't know yet:
- What type of Arduino-Type Board you have (YourDuino RoboRED is "Arduino UNO" )
- Which Port number on your MAC the board is connected to
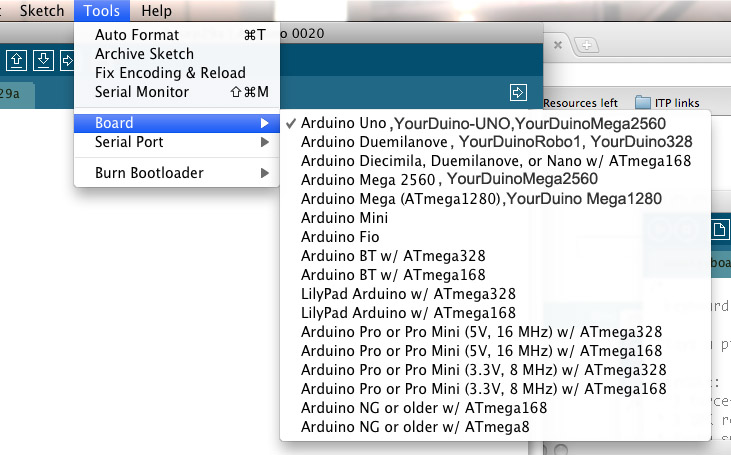
You do that by clicking TOOLS on the top menu of the Arduino IDE. It will look like this:
Now hover over BOARD and then decide which choice to click on, depending on which board you have. Click it.
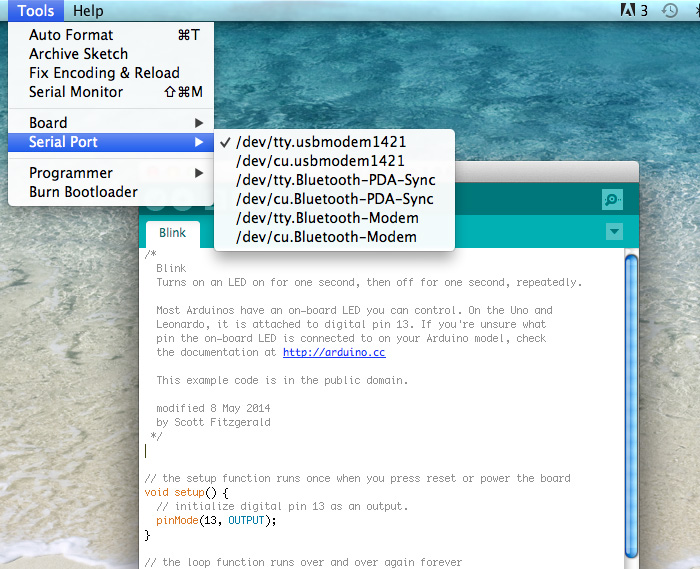
Next, You'll tell your MAC which USB Port your board in connected to. See the photo below.
Click TOOLS and hover over SERIAL PORT. Look carefully in the list:
IF you have a YourDuinoRobo1, or 328 or Mega1280 ,you will see an entry that includes " /dev/tty.usbserial"
Click on that.
IF you have a YourDuino RoboRED or YourDuino-UNO or YourDuinoMega2560 you will see an entry like "/dev/tty.usbmodem"
Click on that.
DONE! Now go back to the Starter Set How-To or wherever you came from, like the Personal Tech page of the New York Times??

