Bluetooth HM-10
HM-10 Bluetooth Low Energy Module
This module provides "Bluetooth Low Energy" which is required for use with all cellphones, including Apple.
Description
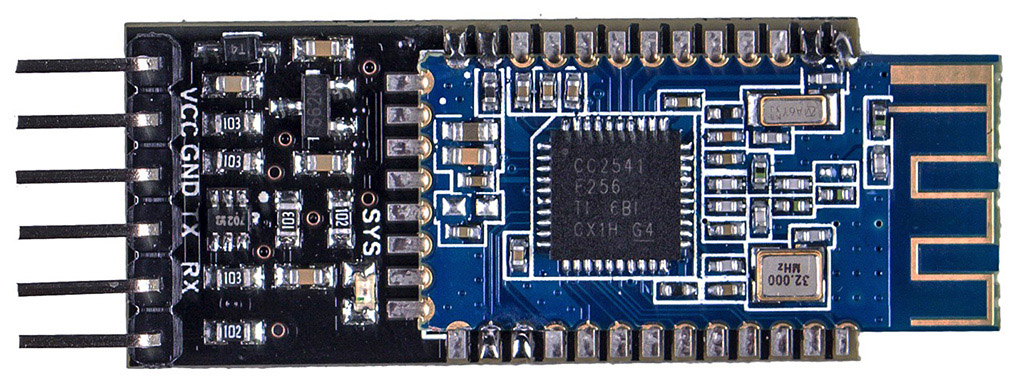
HM-10 BLE (Bluetooth Low Energy) Module based on CC2541 chipset. HM-10 module is supplied as pre-soldered on carrier board. The carrier board has headers for easy connection and prototyping needs.
Other Resources:
Martyn Currey has detailed information HERE(click) about firmware levels and updates.
We have another page HERE(click) that has details of HM-10 Examples and developing projects
Features
- CC2541 Bluetooth Chip
- Fully Qualified Bluetooth V4.0 Ble
- Full Speed Bluetooth Operation with Piconet Support and Scatternet Support
- Small size with 3.3V input.
- RoHS Compliant
- UART Serial interface with baudrate setup function
Technical Specifications
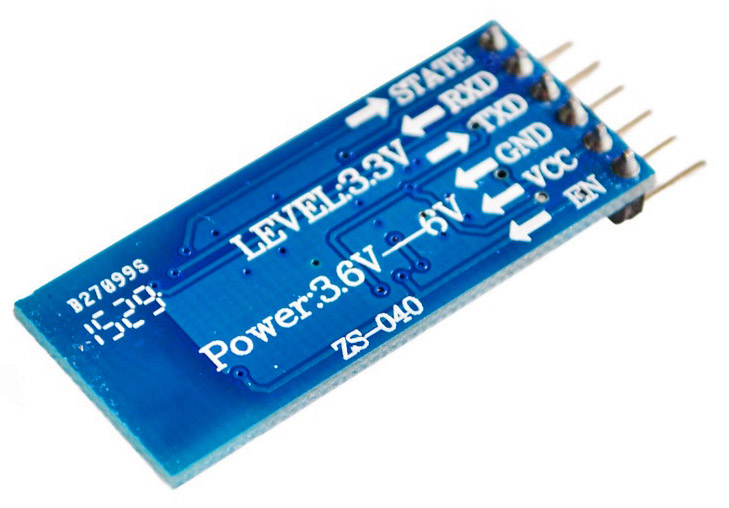
- Operating Voltage: 3.6V to 6V
- I/O Voltage level: 3.3V
- Bluetooth Standard: V4.0 BLE (Bluetooth Low Energy)
- Working frequency: 2.4GHz ISM band
- Authentication and encryption
- Size:37.6mm x 16.6mm x 4.2 mm (without headers)
- Header Pin pitch: Standard 0.1 inch (2.54mm)
Pinouts
- STATE
- RXD
- TXD
- GND
- VCC
- EN
Supported OS
- iPhone 4S/5S/Ipad
- Android 4.3 and Above
- Windows 8
HM-10 TEST ARDUINO SKETCH
/*
  YourDuino Example: HM-10 Test/Setup
  Description: Uses the Serial Monitor to talk with the HM-10. Launch Serial monitor then send AT commands.
  Start with just "AT", HM-10 should respond "OK", then "AT+HELP" to get other usable AT comands.
  Note that with HM-10 comands do not use ? or = after comand. i.e. rather than "AT+HELP?" simply use "AT+HELP"
  Make sure Seral Monitor is in CR & NL mode at 9600 baud.
  Questions?    terry@yourduino.com


  Wiring:

  HM-10 Pinout:
  RX to pin 9 (Software TX)
  TX to pin 8 (Software RX)
  Gnd to Gnd
  Vcc to 5 V


*/
/*-----( Import Needed Libraries)----*/
#include <SoftwareSerial.h>

/*-----( Create Instances )-----*/
SoftwareSerial BTserial(8, 9); //RX,TX to Create sofware serial instance

/*-----( Declare Variables )-----*/
char c = ' ';      // character received
boolean NL = true;

// Initialization
void setup()
{
  Serial.begin(9600);
  Serial.print("Sketch:   ");   Serial.println(__FILE__); // Show filesname, when uploaded
  Serial.print("Uploaded: ");   Serial.println(__DATE__);
  Serial.println(" ");

  BTserial.begin(9600);   // Start Software Serial to talk to HM-10
  Serial.println("BTserial started at 9600");
}

// Arduino Execution Loop
void loop()
{
  // Read from the Bluetooth module and send to the Arduino Serial Monitor
  if (BTserial.available())
  {
    c = BTserial.read();    // Read character from HM-10
    Serial.write(c);        // Print on Serial Monitor
  }

  // Read from the Serial Monitor and send to the Bluetooth module
  if (Serial.available())
  {
    c = Serial.read();
    BTserial.write(c);
    Serial.write(c);
  }
}//END LOOP
AT Commands
NOTE: EVERY HM-10 FIRMWARE WILL HAVE ITS OWN LIST! USE "AT+HELP" to get list
- AT (Test command)
- AT+BAUD (Query/Set Baud rate)
- AT+CHK (Query/Set parity)
- AT+STOP (Query/Set stop bit)
- AT+UART (Query/Set uart rate,parity, stop bit)
- AT+PIO (Query/Set PIO pins status Long command)
- AT+PIO (Query/Set a PIO pin sttus Short command)
- AT+NAME (Query/Set device friendly name)
- AT+PIN (Query/Set device password code)
- AT+DEFAULT (Reset device settings)
- AT+RESTART (Restart device)
- AT+ROLE (Query/Set device mode, Master or Slave)
- AT+CLEAR (Clear remote device address if has)
- AT+CONLAST (Try to connect last connect succeed device)
- AT+VERSION (Show software version information)
- AT+HELP (Show help information)
- AT+RADD (Query remote device address)
- AT+LADD (Query self address)
- AT+IMME (Query/Set Whether the device boot immediately)
- AT+WORK (if device not working, start work, use with AT+IMME command)
- AT+TCON (Query/Set Try to connect remote times)
- AT+TYPE (Query/Set device work type, transceiver mode or remote mode)
- AT+START (Switch remote control mode to transceiver mode)
- AT+BUFF (Query/Set How to use buffer data, Duing mode switching time)
- AT+FILT (Query/Set device filter when device searching) A
- T+COD (Query/Set Class of Device. eg: phone, headset etc.)
AT Commands V2 1/21 YD HM-10
(From AT+HELP on YD HM-10 1/21 )
- Command Description *
- ---------------------------------------------------------------- *(RETURNS)
- AT Check if the command terminal work normally * OK
- AT+RESET Software reboot *
- AT+VERSION Get firmware, bluetooth, HCI and LMP version *
- AT+HELP List all the commands *
- AT+NAME Get/Set local device name *
- AT+PIN Get/Set pin code for pairing *
- AT+BAUD Get/Set baud rate *
- AT+LADDR Get local bluetooth address *
- AT+ADDR Get local bluetooth address *
- AT+DEFAULT Restore factory default *
- AT+RENEW Restore factory default *
- AT+STATE Get current state *
- AT+PWRM Get/Set power on mode(low power) *
- AT+POWE Get/Set RF transmit power *
- AT+SLEEP Sleep mode *
- AT+ROLE Get/Set current role. *
- AT+PARI Get/Set UART parity bit. *
- AT+STOP Get/Set UART stop bit. *
- AT+INQ Search slave model *
- AT+SHOW Show the searched slave model. *
- AT+CONN Connect the index slave model. *
- AT+IMME System wait for command when power on. *
- AT+START System start working. *
- AT+UUID Get/Set system SERVER_UUID . *
- AT+CHAR Get/Set system CHAR_UUID . *
- -----------------------------------------------------------------*
- Note: (M) = The command support master mode only.
Command Results YD HM-10 1/21
AT
OK
AT?
ERROR
AT+RESET
OK
AT+VERSION
+VERSION=v5.3
AT+NAME
+NAME=BT05
AT+PIN
+PIN=123456
AT+BAUD
+BAUD=4
AT+LADDR
+LADD=D03972C68D16
AT+ADD
ERROR
AT+ADDR
ERROR
AT+LADDR
+LADD=D03972C68D16
AT+STATE
ERROR
AT+ROLE
+ROLE=0
AT+LADDR
+LADD=D03972C68D16
Pairing 2 HM10 Bluetooth Modules
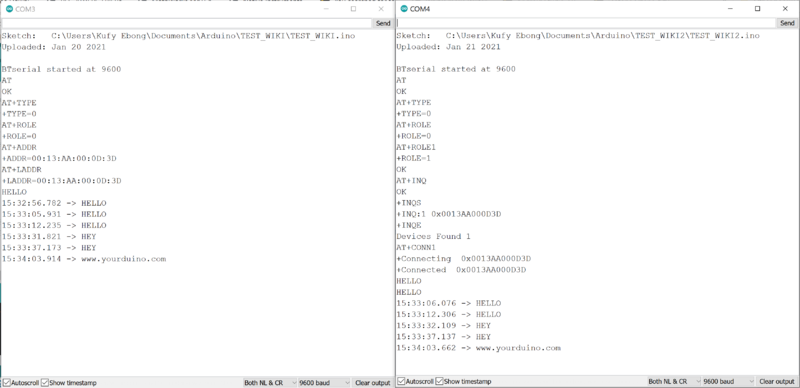
Two Arduino boards can communicate via mainly wired and wireless means. The HM10 module can serve as a serial-to-wireless bridge, allowing serial communication via wireless means. To achieve this with at least 2 Arduino's, we also need 2 HM10 modules. Here are the steps to follow:
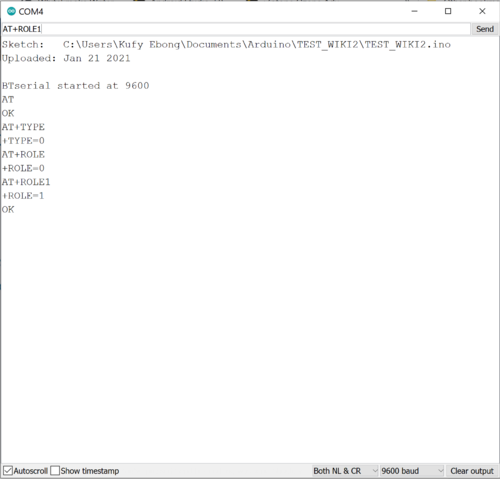
1. Query the modem (HM10) to see that your connections are OK by sending AT
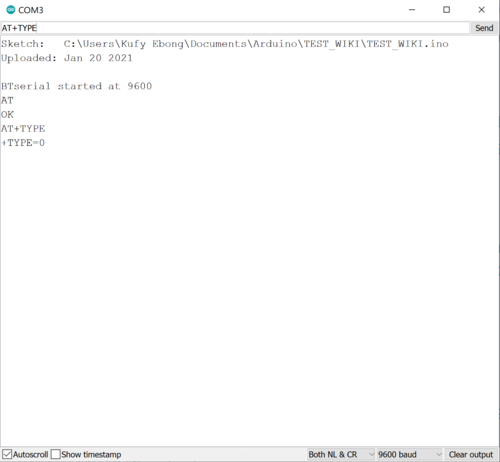
2. Query the modem to check if the TYPE is set to 0. The TYPE describes the module bond mode. There are 4 types of bond modes:
- 0 means do not ask to pair or for PIN
- 1 means PIN not needed but pairing needed to connect
- 2 means PIN needed but pairing not needed to connect
- 3 means require both PIN and pairing to connect
To set the TYPE, send AT+TYPE0
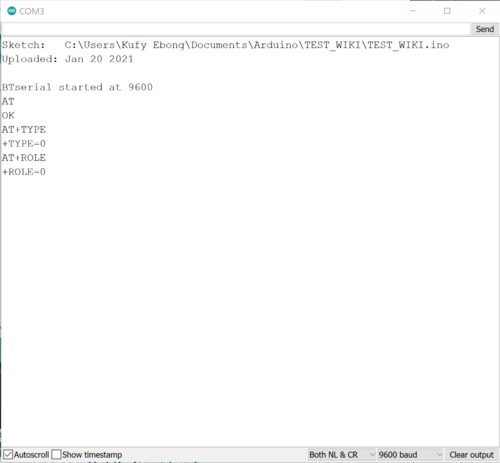
3. Set the role of one of the boards to slave by sending AT+ROLE0.
4. Set the role of the other board to master by sending AT+ROLE1.
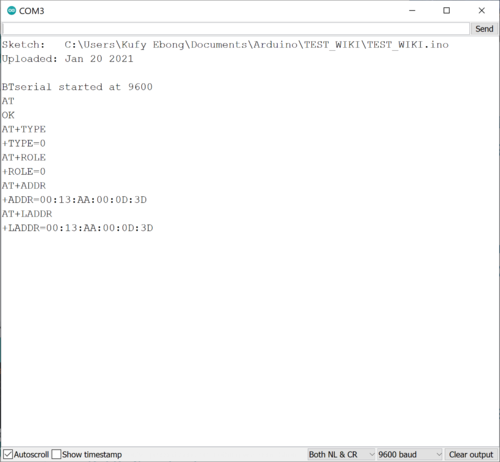
5. On the slave device, get the slave address (mac address of the HM10 module). Use either AT+ADDR or AT+LADDR.
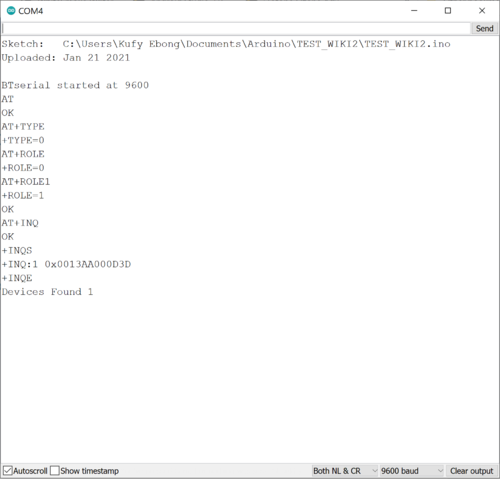
6. On the master device, scan for available devices. Send AT+INQ.
Recognize the mac address found by the master device. Take note of the index. In this case the index is 1.
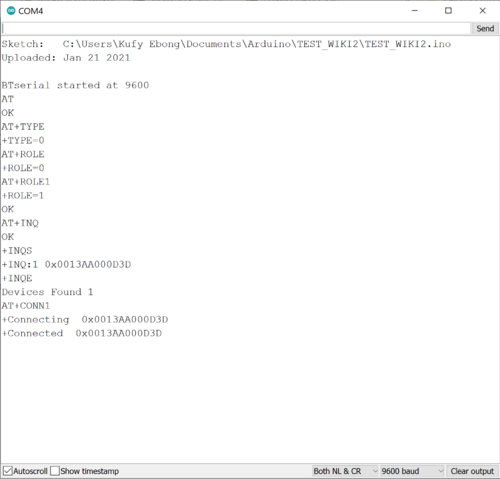
7. Connect to the device's index (the number right after the +INQ:) with this command AT+CONN1. The number after CONN is the index of the mac address. What happens is that the HM10 stores the results of the scan in a temporary memory and allocates indices to each of the discovered devices. To display discovered devices. send AT+SHOW.
8. Now the devices are connected. You can send messages from either of the devices to the other.
Documents and Downloads
- HM-10 Device Datasheet
- Video Bluetooth 4.0 (BLE) – 06: Serial connection
- Video Bluetooth 4.0 (BLE) – 07: Data transfer and remote control
- nRF Connect introduction video
- nRF Connect Apps for following platforms:
- Manufacturer’s Android app called HMBLEComAssistant that can be used as Serial Terminal (no configuration required). The app requires manual installation of .apk file. Make sure you allow “verify apps over USB” in your android phone or tablet under developer options
zz
