LiPoBattery2Arduino
SMALL 2S LiPo Battery to Arduino
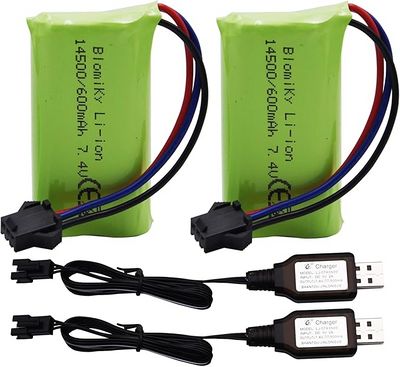
These batteries come with a SM-3P plug and a USA pluggable charger. They are low cost because they are used in many small toys/robots. They are often sold as a pack of two. We'll use them one at a time. They have two 3.7V LiPo cells (Referred to as 2S) for a voltage of 7.4V. See Amazon: https://www.amazon.com/dp/B0C3HG2FT1
The SM-3P connector is needed for the supplied charger to work and equalize the two LiPo cells (3.7V each) that make up the 7.4V battery.
To Use this battery type with Arduino
NOTE: It would be good to first upload a Blink program to the Arduino with an unusual blink speed so you can know later if the Arduino is working properly with the battery.
- Identify the correct pins on the SM-3P plug. Typically, it has three pins: positive (+), negative (-), and a center pin used by the charger.
The wire colors are usually RED (+) and BROWN (-) which are the two outer pins.
You will need two wires that have Male connector ends. You can use two of the typical "ribbon cable" wires. (Strip off two from the ribbon.) Maybe use the two adjacent Brown and Red wires, with BROWN for (-) and RED for (+). The cable we have has Female ends, so: We will.use 3-wide sections of Pin Strips at the end of the wires to make Male plugs for the battery and the Arduino. You can get cables like this that come with Male ends. A nice set of 3 possibilities is THIS from Amazon. And the pin strips can be found here .
How To make the cable and plugs (NO soldering)
- From a multicolor ribbon cable with female ends we will strip off a 2-wire section of Brown and Red
- We will use small male-to-male Pin Strips by grabbing 3-pin sections and twisting them off to make 3-pin plugs
- We will attach the 3-pin plugs on the ends of the 2 wire cables, using the OUTER two pins
- So the ends of the cable will look like the photo, with pins sticking out
- Then we will plug one end of the cable into the battery connector, aligning Red to Red, Brown to Brown like the rightmost photo
NOTE: Be Careful to NOT short out the end of the new battery cable; it has pins sticking out.
Connections to the Arduino
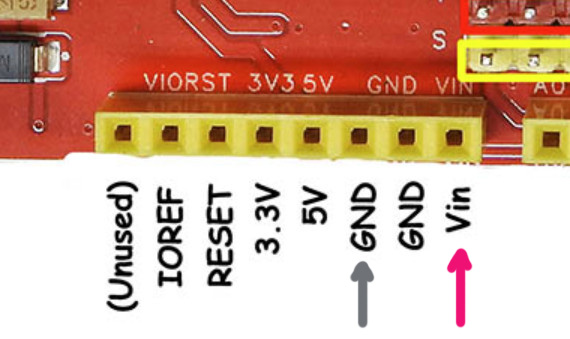
Look carefully at the female connectors around the edge of every Arduino. Find this section at lower left.
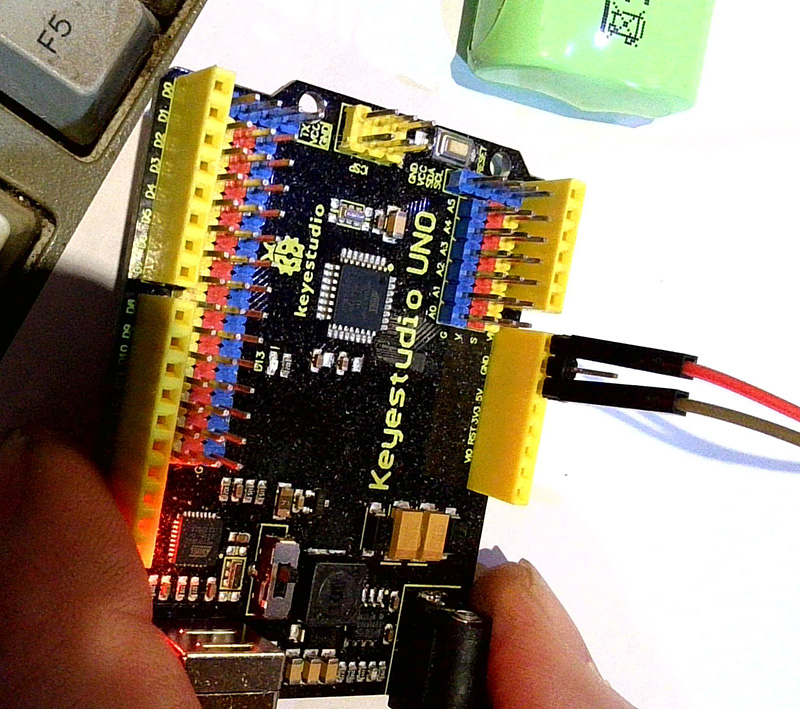
We will plug our 3-pin plug CAREFULLY to the 3 pins labelled GND GND Vin. Align the Brown and Red wires. On the Arduino it should look like this:
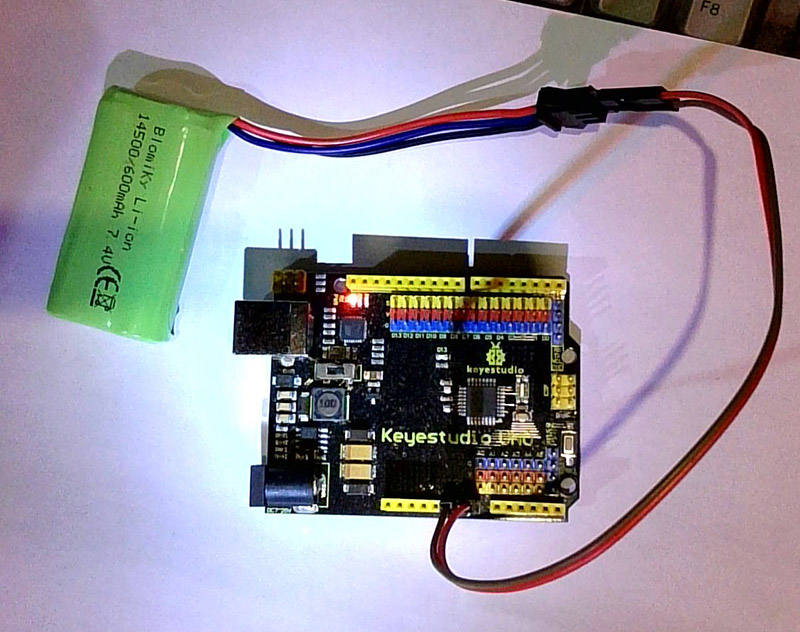
And all together:


