YourDuino-Serial-Monitor
HOW-TO USE THE ARDUINO SERIAL MONITOR
The Arduino IDE has a feature that can be a great help in debugging sketches or controlling Arduino from your computer's keyboard.
The Serial Monitor is a separate pop-up window that acts as a separate terminal that communicates by receiving and sending Serial Data. Serial Data is sent over a single wire (but usually travels over USB in our case) and consists of a series of 1's and 0's sent over the wire. Data can be sent in both directions (In our case on two wires).
![]()
Problem: Wrong Baud Rate
If you see something like this, or only a few wrong characters, the baud rate set on the serial monitor does not match the Arduino or other device sending data.
4�⸮⸮⸮⸮⸮⸮⸮⸮⸮⸮⸮⸮⸮⸮⸮⸮Ǜ⸮K⸮⸮4⸮⸮�⸮⸮⸮⸮⸮7⸮⸮˒⸮Ǐ4⸮⸮�⸮[⸮⸮⸮�⸮⸮⸮K⸮⸮⸮⸮⸮⸮⸮⸮⸮⸮⸮⸮⸮⸮⸮�⸮⸮⸮⸮⸮⸮⸮⸮⸮⸮⸮⸮⸮⸮⸮⸮K⸮⸮⸮�4⸮⸮⸮⸮⸮⸮
When you have an Arduino connected by USB, and the IDE opened, you will see an icon on the far right like this (hover over it):
![]()
When you click on it, the Serial Monitor will pop up in a new window. Here's what our example Serial Monitor Sketch looks like with the Monitor opened:
(NOTE: The sketch, which you can cut and paste into the IDE, is below.)
Look at the Serial Monitor window.
- The small upper box is where you can type in characters (hit <enter> or click "Send")
- The larger area (Corner can be dragged to enlarge) is where characters sent From Arduino will be displayed.
- At the bottom are two pulldowns:
- One sets the "line ending" that will be sent to Arduino when you <enter> or click Send
- The other sets the Baud Rate for communications. (If this does not match the value set up in your sketch in Setup, characters will be unreadable).
Example: Serial.begin(9600); Some sketches or other applications may use a different Baud Rate.
DEBUGGING WITH SERIAL MONITOR:
If you are testing a new sketch you may need to know what's happening when you try to run it. But "Software Is Invisible". So you need the tell the software to tell you what it's doing so it's visible, and sometimes the value of changing variables. You do this my using the Serial Monitor and adding code to your sketch to send characters that you can see.
SETUP:
In Setup you need to begin Serial Communications and set the Baud Rate (speed) that data will be transferred at. That looks like this:
Serial.begin(9600); // Other baud rates can be used...
Serial.println("My Sketch has started");
The second line is optional...
LOOP:
Here you can print helpful info to the Serial Monitor. Examples:
Serial.println("Top of loop");
Serial.println("Reading Temperature Sensor");
Serial.print("LoopCounter value = ");
Serial.println(LoopCounter);
For details of how to show different data, see " Serial_Print.html" in the Reference section of your Arduino IDE: Top menu: Help>reference/Serial_Print.html
NOTE: Every time you start the Serial Monitor it resets Arduino and your sketch starts over at the beginning.
Example Serial Communications Sketch: (Cut-Paste) (Thanks Peter Hellen, for fixing this!)
/* YourDuinoStarter_SerialMonitor_SEND_RCVE
  - WHAT IT DOES:
   - Receives characters from Serial Monitor
   - Displays received character as Decimal, Hexadecimal and Character
   - Controls pin 13 LED from Keyboard
  - SEE the comments after "//" on each line below
  - CONNECTIONS:
   - None: Pin 13 built-in LED
   -
  - V1.01 11/29/2019 FIXED - THANKS! Peter Hellen
   Questions: terry@yourduino.com */

/*-----( Import needed libraries )-----*/
/*-----( Declare Constants and Pin Numbers )-----*/
#define led 13  // built-in LED
/*-----( Declare objects )-----*/
/*-----( Declare Variables )-----*/
int ByteReceived;

void setup()   /****** SETUP: RUNS ONCE ******/
{
  pinMode(led, OUTPUT);
  Serial.begin(9600);
  Serial.println("--- Start Serial Monitor SEND_RCVE ---");
  Serial.println(" Type in Box above, <ENTER>. ");
  Serial.println("(Decimal)(Hex)(Character)");
  Serial.println();

}//--(end setup )---


void loop()   /****** LOOP: RUNS CONSTANTLY ******/
{
  if (Serial.available() > 0)
  {
    ByteReceived = Serial.read();
    Serial.print(ByteReceived);
    Serial.print("        ");
    Serial.print(ByteReceived, HEX);
    Serial.print("       ");
    Serial.print(char(ByteReceived));

    if (ByteReceived == '1') // Single Quote! This is a character.
    {
      digitalWrite(led, HIGH);
      Serial.print(" LED ON ");
    }

    if (ByteReceived == '0')
    {
      digitalWrite(led, LOW);
      Serial.print(" LED OFF");
    }

    Serial.println();    // End the line

  }// END Serial Available

}//--(end main loop )---

/*-----( Declare User-written Functions )-----*/


//*********( THE END )***********
The Serial PLOTTER
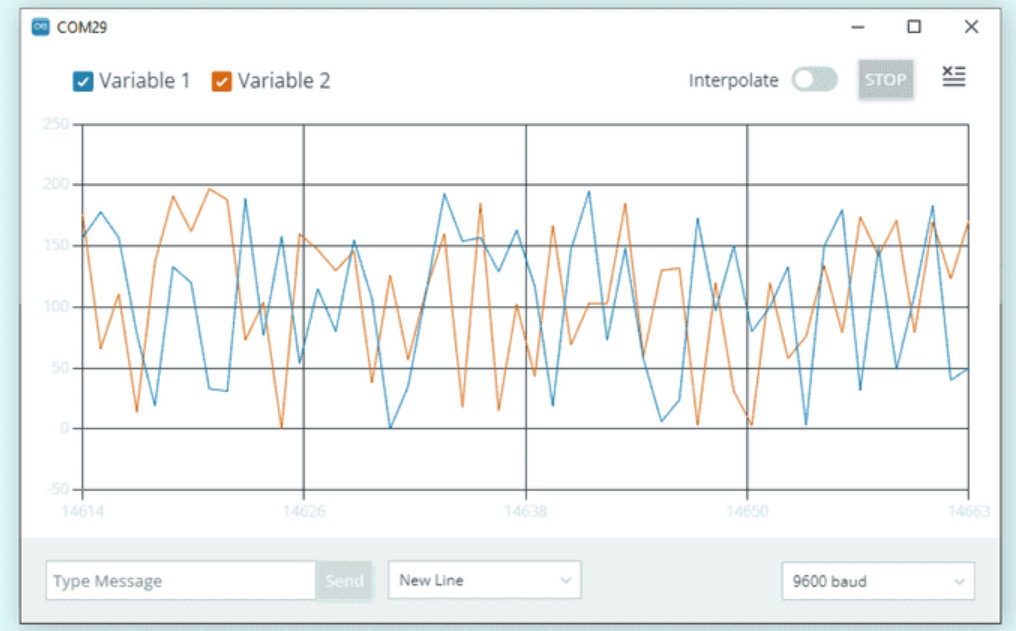
Recent Arduino IDE versions (2.0 and later) include a SERIAL PLOTTER function that can create a graphic plot of data you send to the Serial Monitor. Learn all about it on the Arduino DOCS pages Click HERE. It might look like this:
OTHER TERMINAL MONITORS YOU MIGHT LIKE:
Serial data is Serial data So other things (like the PROCESSING language and IDE) and other terminal programs can interact with your Arduino using it. Here are some possibilities:
Putty [Windows]
License: MIT.
Hands-down one of our favorite terminal applications for Windows is PuTTY from Simon Tatham
In addition to being a great serial terminal it can also handle telnet, ssh, and a host of other things (no pun intended). If you’re using Windows, this is probably your best go-to terminal application.
Screen [Mac, Linux]
Download: NONE (Already exists in MAC ) [1]
Screen is a command line based fullscreen VT100 emulator. It makes a create terminal client and has the ability to “detach” from the current terminal to run in the background. When it comes to serial communication, it’s the tool we use the most outside of the Serial Monitor. Drop to a terminal window and run screen:
PROCESSING:
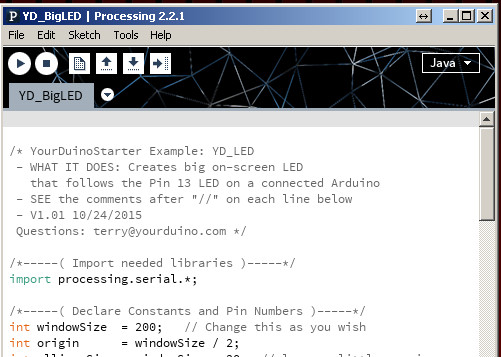
PROCESSING is a PC and MAC language that works well in interacting with Arduino over Serial communications. You would need to install the free "Processing" IDE on your computer. See: https://processing.org/download/
You will see that it looks almost like Arduino! That's because Arduino came from Processing.

