YourDuinoRobotArm
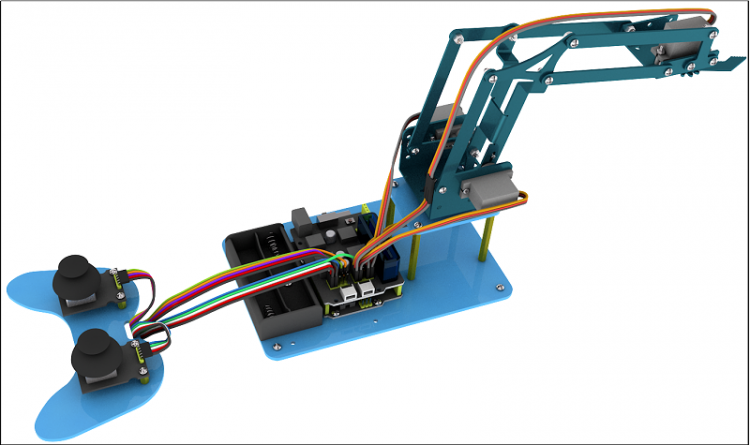
THIS PROJECT IS UNDER CONSTRUCTION! Questions? terry@yourduino.com This is a well-designed mechanical arm driven by 4 servos.

HOW-TO Build the Robot Arm:
HINTS and HELPS before starting construction
There are very many very small parts in this kit! Here are some suggestions on organizing them.
There are 12 small plastic pages of fasteners (Screws, bolts, nuts) in the kit. What could we find that has 12 small sections to hold them?? Look in the fridge... What food comes in a group of 1 dozen?
Setting the servos before assembling them
We have an Arduino sketch than makes it easy to set each servo to the proper angle before attaching it's connecting piece and assembling it into the arm. You can type in an angle (like 45 or 90 etc.) and it will go to that angle. It can also run a "servo-Sweep" to test your servo. Copy the arduino sketch below and VERIFY it and SAVE IT with a name like "servoset". Upload it to your arduino and connect your servo on port "A0" (Reusing one of the 'analog' ports. This is the first (top) 3-pin connector on the Motor Driver shield.
NOTE! Make SURE the BLACK servo wire goes to the rightmost pin. Notice the "S V G" marking at the bottom of the set of 3-pin connectors. Those are the Signal, Voltage and Ground connections.
CLICK HERE for the code page.
BEGINNING CONSTRUCTION
PROBLEMS WITH SCREWS AND HARDWARE AND TOOLS
The smallest screws supplied with the kit are actually TOO SMALL to hold the different metal parts to the plastic servo parts. Those screws are labelled Self-tapping screw M1.2*4mm .
A solution is to use slightly larger screws that are supplied with each servo, in the small plastic bag. See the following photos.


Below on the right the first arm is attached to the servo. NOTE: It takes some force to get the plastic servo adapter securely onto the splined metal servo shaft. Then use the 'Center Screw' to tighten it into place.

