Bricks&Breadboards-MakingConnections
Bricks, Breadboards and Shields - Making Connections
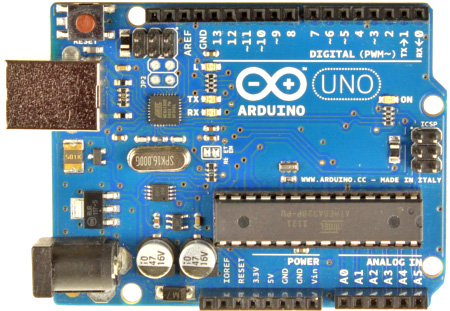
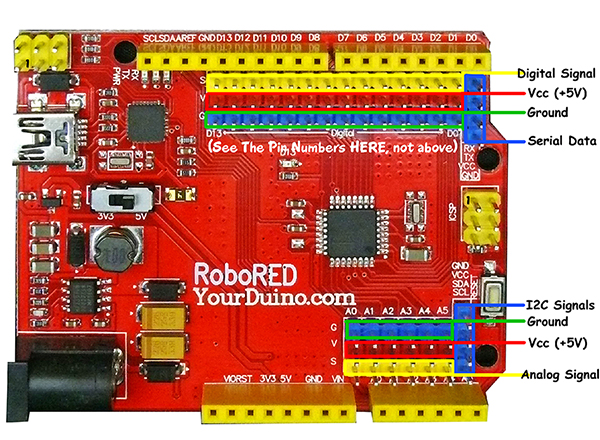
Arduino projects always involve Making Connections. Let's look at these Arduino Compatible boards: An Arduino UNO type on the left, A YourDuino RoboRED on the right:


The original Arduino has rows of black connectors at the top and bottom, as you see in the photo on the left. To connect input and output devices you plug wires with pins on the end into those black connectors. Most devices also need to connect to power (+5V) and Ground. If you have anything more than 1 or 2 very simple devices, it's difficult to make connections. The RoboRED has those same connectors (top and bottom yellow strips) but adds 3-pin connectors on every I/O pin (more Info HERE).
Here are a few examples of the kind of things you may want to connect:
| INPUT DEVICES |
OUTPUT DEVICES |
| push-button switches [Digital Input] |
LEDs - 5 different colors, plus RGB Multicolor LED, plus 220 ohm resistors [Digital or Analog Output] |
| 10K Potentiometers [Analog Input] |
Buzzer Module (makes sound with voltage applied) [Digital Output] |
| 10K PhotoResistors (Light sensors) [Analog Input] |
Beeper Module (Makes different sounds/tones with Arduino TONE Library) [Analog Output] |
| Digital temperature sensor DS18B20 [Digital Signal Input] |
Servo Motor (Mechanical positioning from digital pulses] [Digital Signal Output] |
| opto-isolated 2-channel Relay Board [Digital Output] |
These are the devices in a typical Starter Setlike the one shown here)
So, how can you connect these devices to Arduino??
Here are three different approaches to making more complex connections, and like most things in Electronics, they vary in cost, ease of use and flexibility. Here are examples of these three:
| ELECTRONIC BRICKS - Cable Connections |
| SolderLess BREADBOARD |
| ETHERNET SHIELD |
On the left are examples of Electronic Bricks. These are simply small printed circuit boards with the components mounted on them, along with other needed components, and a 3-pin connector. They can be simply plugged in with a small 3-pin cable that also provides power and ground connections. The cables can plug into the YourDuinoRoboRED (See the added connectors in the upper right photo), or by plugging a Sensor Shield (See example) on top of a regular Arduino. The photo shows (clockwise from lower right) a Pushbutton Switch, OptoInterrupter Module, Sound Sensor with microphone and amplifier, ServoMotor, and Relay
Board. These all plug in directly with a 3-pin cable.
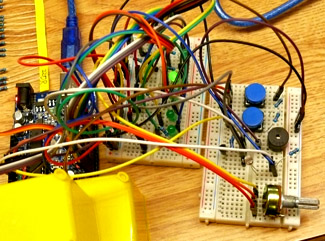
 In the center photo above is the typical "Solderless Breadboard" used in many Starter Sets.(Details HERE) The breadboard allows any device with small pins to plug into holes that make contact with metal strips below the white plastic you see. The example has an LED and current-limiting resistor connected to Arduino pin 13 and Ground. +5V has also been connected to the red bus strip across the top. Breadboards can be used to connect many components, but it can get a little complicated looking (right) :-)
Here are are two recent student projects using breadboards:


On the left is a 9-LED panel that ran very complex patterns based on data tables created by two girls. The breadboard was used to interconnect the LEDs, Arduino and resistors. Later this was all mounted in a black box.
In the center is the prototype version of a complex game programmed by a high school student. It was first built with pushbuttons and LED connections on the breadboard. After it was all working (AKA "DeBugged") a foamcore panel (right) was built that held the LEDS and switches. The game is won by turning off all the LEDS. But when you push a button a different pattern of surrounding LEDs goes on. It IS possible to win it, though.
Arduino SHIELDS:
A third way to add circuits (often complex ones) to Arduino is by plugging a SHIELD on top, that has pins that plug into every socket on the top and bottom black strips. Here are a few examples:


On the left is a "Motor Shield" with two L293 Motor Driver chips and other circuitry. In the center is a GPRS/GSM shield that has full cellphone infrastructure connection ability. On the right is a "Sensor Shield" which brings all the original Arduino pins out to 3-pin groups that can be easily cabled to Electronic Bricks like the pushbutton and LED shown. The Yourduino RoboRED shown at the top already has all I/O pins brought out to 3-pin connectors, so you don't need a Sensor Shield.


