InstallingTelemetrix4Arduino
Telemetrix4Arduino
Installation on your Arduino board
Telemetrix works by first loading your Arduino board with a large amount of software called Telemetrix4Arduino.
This software creates a "server" on your Arduino which other software on a PC or MAC can use to control and sense all the pins on your Arduino. It also includes software support for many different sensors and actuators you may want to use in projects. See the list farther down in this page.
You will normally use and reuse the Telemetrix4Arduino software on your Arduino for many different Python programs and won't have to reload it. It is saved in Non-volatile memory in your Arduino when you power it off. It becomes "Firmware (W)" (The W means this link is to Wikipedia)
Installation Instructions
NOTE: You must have first downloaded and installed the Arduino System software. This includes the "Arduino IDE (W) " which you would use in coding Arduino yourself. (See our how-to HERE )
- Open the Arduino IDE and select Tools/Manage Libraries. In recent Arduino versions there is an Icon on the left side that opens the Library area with one click.
- Enter "Telemetrix4Arduino" in the search box at the top. Looks like this:
- Click on the Install button. You will be prompted to allow the installation of additional libraries. Accept the installation for all.
Click the Library icon again to dismiss it.
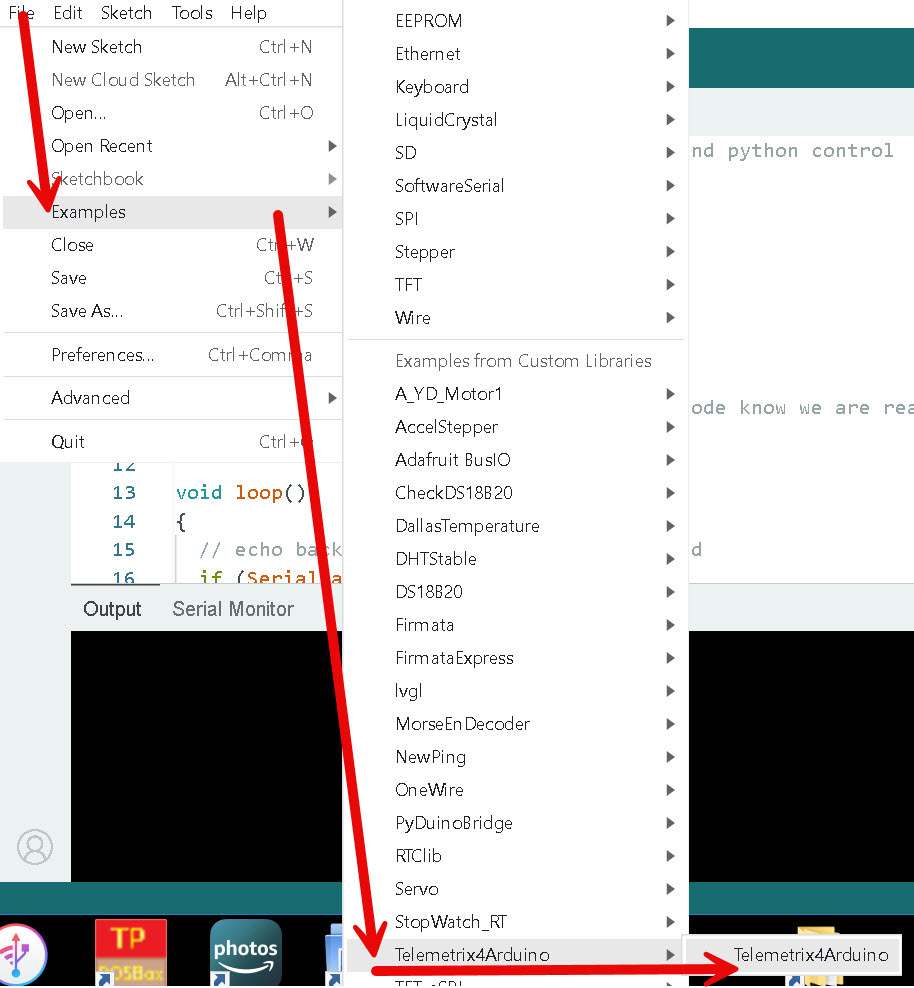
- Now locate the "Telemetrix4Arduino" software sketch as shown here:
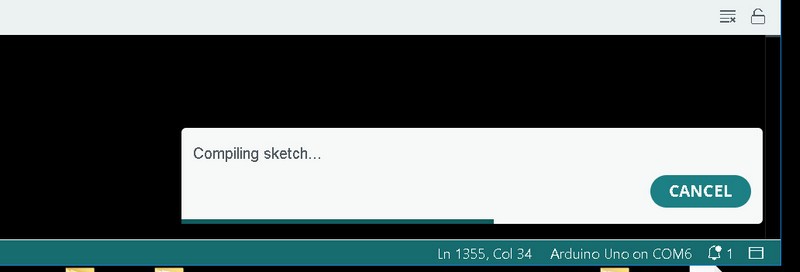
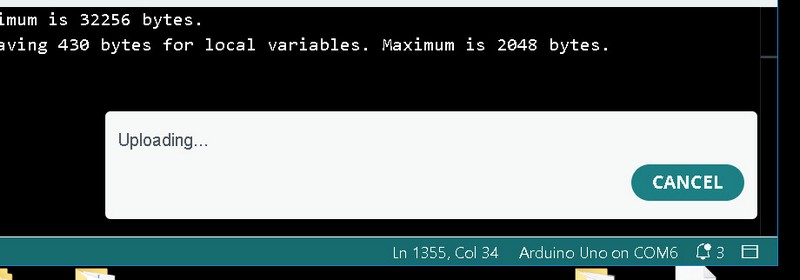
- Now upload Telemetrix4Arduino to your Arduino board by selecting File/Examples/Telemetrix4Arduino/Telemetrix4Arduino and then clicking the upload button on the IDE.
NOTE: Telemetrix4Arduino, in conjunction with the Telemetrix Project clients, associates a specific Arduino board with your application. You typically will have only have a single Arduino connected at a time and Telemetrix will find it, so you do not need to do anything. However, if you wish to run multiple Arduinos, you must assign each one a unique ID number.
NOTE: If you use an Arduino Uno, you may see a warning about Low Memory in the Arduino IDE after compiling. You may ignore this warning.
Ready to write python??
If the install of the Arduino 'firmware' for Telemetrix4Arduino went OK, you are ready to use A python editor like IDLE on the PC or MAC to write python code! Then when you RUN it, Telemetrix will talk to Arduino with the Telemetrix interface.
Quick python examples using Telemetrix
A TEMPLATE to use to start a new python program
""" ( YourDuinoStarter_pythonTemplate2.py)
YourDuinoStarter Example: Python code Template
- WHAT IT DOES (Eample of starting code )
- SEE the comments after # on each line below
- CONNECTIONS:
-
-
- V1.02 11/25/24
Questions: terry@yourduino.com
"""
#-----( Import needed libraries )-----
import time #-(For delays, time, day etc )-
import sys
from telemetrix import telemetrix
#-----( Declare Constants and Pin Numbers )-----
#-----( Declare objects )-----
board = telemetrix.Telemetrix()
#-----( Declare Variables )-----
#none
#-----( Declare User-written Functions )-----
#none
#-----( Do SETUP Actions once )-----
print()
print('-----( Hello Python World )------------') # to test
print()
#-----( MAIN code block )--------
#-----( Program Termination )--------
print('--- DONE --- ')
board.shutdown()
sys.exit(0)
"""********( THE END )***********"""
BLINK Arduino LED on Pin 13
""" YD_Blink.py
YourDuinoStarter Example: Python code Template
- WHAT IT DOES: Blinks onboard pin 13 LED
- SEE the comments after " " " on each line below
- CONNECTIONS: Built-In LED on PIN 13
- V1.00 11/22/24
Questions: terry@yourduino.com
"""
#-----( Import needed libraries (?? Modules? )-----
import sys
import time
from telemetrix import telemetrix
#-----( Declare Constants and Pin Numbers )-----
DIGITAL_PIN = 13 # the UNO onboard LED
#-----( Declare objects )-----
board = telemetrix.Telemetrix()
#-----( Declare Variables )-----
#NONE
#-----( Declare User-written Functions )-----
#NONE
#-----( Do SETUP type Actions once )-----
print()
print('Starting BLINK ')
board.set_pin_mode_digital_output(DIGITAL_PIN)
#-----( REPEAT / LOOP if needed )--------
for blink in range(5):
try:
print('1')
board.digital_write(DIGITAL_PIN, 1)
time.sleep(0.25)
print('0')
board.digital_write(DIGITAL_PIN, 0)
time.sleep(1)
except KeyboardInterrupt:
board.shutdown()
sys.exit(0)
"""********( THE END )***********"""
Test SERVO connected to Arduino Pin 5
""" ( YourDuinoStarterSweep_Servo3.py)
YourDuinoStarter Example: Python code Servo
- WHAT IT DOES - Attach a pin to a servo and move it about.
- SEE the comments after # on each line below
- CONNECTIONS:
- Servo on Pin 5
-
- V1.03 11/22/24
Questions: terry@yourduino.com
"""
#-----( Import needed libraries )-----
import sys
import time
from telemetrix import telemetrix
#-----( Declare Constants and Pin Numbers )-----
SERVO_PIN = 5
#-----( Declare objects )-----
board = telemetrix.Telemetrix()
#-----( Declare Variables )-----
SleepTime = 5
SweepDelay = 0.2
ServoMin = 20 # Reduced servo p[ositions for unknown servos
ServoMax = 160
#-----( Declare User-written Functions )-----
#None
#-----( Do SETUP Actions once )-----
print('Hello SERVO') # to test
board.set_pin_mode_servo(SERVO_PIN, 100, 3000)
#-----( MAIN code block )--------
time.sleep(.2)
print('SERVO Min Degrees')
board.servo_write(SERVO_PIN, ServoMin)
time.sleep(SleepTime)
print('SERVO Max Degrees')
board.servo_write(SERVO_PIN, ServoMax)
time.sleep(SleepTime)
print('SERVO 45 Degrees')
board.servo_write(SERVO_PIN, 45)
time.sleep(SleepTime)
print('SERVO 90 Degrees')
board.servo_write(SERVO_PIN, 90)
time.sleep(SleepTime)
print('SERVO MIN Degrees')
board.servo_write(SERVO_PIN, ServoMin)
time.sleep(SleepTime)
board.servo_detach(SERVO_PIN)
time.sleep(.2)
board.shutdown()
"""********( THE END )***********"""
board.shutdown()
Test and Sweep SERVO connected to Arduino Pin 5
""" ( YourDuinoStarter_ServoSweep2.py)
YourDuinoStarter Example: Python code Servo Sweep
- WHAT IT DOES - Attach a pin to a servo and move it about.
- SEE the comments after # on each line below
- CONNECTIONS:
- Servo on Pin 5
-
- V1.04 11/25/24
Questions: terry@yourduino.com
"""
#-----( Import needed libraries )-----
import sys
import time
from telemetrix import telemetrix
#-----( Declare Constants and Pin Numbers )-----
SLEEP_TIME = 1
SWEEP_DELAY = 0.2
SERVO_MIN = 20 # Reduced servo p[ositions for unknown servos
SERVO_MAX = 160
SERVO_STEP = 5
SERVO_PIN = 5
#-----( Declare objects )-----
board = telemetrix.Telemetrix()
#-----( Declare Variables )-----
ServoNow = 0
#-----( Declare User-written Functions )-----
#None
#-----( Do SETUP Actions once )-----
print('Hello SERVO') # to test
board.set_pin_mode_servo(SERVO_PIN, 100, 3000)
#-----( MAIN code block )--------
time.sleep(.2)
print('SERVO Min Degrees')
board.servo_write(SERVO_PIN, SERVO_MIN)
time.sleep(SLEEP_TIME)
print('SERVO Max Degrees')
board.servo_write(SERVO_PIN, SERVO_MAX)
time.sleep(SLEEP_TIME)
print('SERVO 45 Degrees')
board.servo_write(SERVO_PIN, 45)
time.sleep(SLEEP_TIME)
print('SERVO 90 Degrees')
board.servo_write(SERVO_PIN, 90)
time.sleep(SLEEP_TIME)
print('SERVO MIN Degrees')
board.servo_write(SERVO_PIN, SERVO_MIN)
time.sleep(SLEEP_TIME)
print()
print('NOW try sweeping back and forth.')
for ServoNow in range(SERVO_MIN, SERVO_MAX, SERVO_STEP):
print(f'ServoAngle: {ServoNow}')
board.servo_write(SERVO_PIN,ServoNow)
time.sleep(SWEEP_DELAY)
print('Now Back again')
time.sleep(SLEEP_TIME)
for ServoNow in range(SERVO_MAX, SERVO_MIN, -SERVO_STEP):
print(f'ServoAngle: {ServoNow}')
board.servo_write(SERVO_PIN,ServoNow)
time.sleep(SWEEP_DELAY)
print('SERVO SWEEP DONE')
board.servo_detach(SERVO_PIN)
time.sleep(.2)
board.shutdown()
"""********( THE END )***********"""
Test Analog Input connected to Arduino Analog Pin 0
Uses a potentiometer from +5V and Gnd to Arduino pin A0 .
""" ( YourDuinoStarter_AnalogIn.py)
Copyright (c) 2020 Alan Yorinks All rights reserved.
YourDuinoStarter Example: Python code Template
- WHAT IT DOES: Reads an Analog input pin and displays data
- SEE the comments after # on each line below
- CONNECTIONS: Potentiometer from +5V and Gnd to pin Analog pin
-
- V1.03 11/24/24
Questions: terry@yourduino.com
"""
#-----( Import needed libraries )-----
import sys
import time
from telemetrix import telemetrix
#-----( Declare Constants and Pin Numbers )-----
ANALOG_PIN = 0 # arduino pin number (A0)
# Callback data indices
CB_PIN_MODE = 0
CB_PIN = 1
CB_VALUE = 2
CB_TIME = 3
#-----( Declare Variables )-----
#NONE
#-----( Declare User-written Functions )-----
def the_callback(data):
"""
A callback function to report data changes.
This will print the pin number, its reported value and
the date and time when the change occurred
:param data: [pin, current reported value, pin_mode, timestamp]
"""
date = time.strftime('%Y-%m-%d %H:%M:%S', time.localtime(data[CB_TIME]))
print(f'Pin Mode: {data[CB_PIN_MODE]} Pin: {data[CB_PIN]} Value: {data[CB_VALUE]} Time Stamp: {date}')
#----( Delay added for test TK )-----
# time.sleep(1)
#----------------------------------------
def analog_in(my_board, pin):
"""
This function establishes the pin as an
analog input. Any changes on this pin will
be reported through the call back function.
:param my_board: a telemetrix instance
:param pin: Arduino pin number
"""
# set the pin mode
my_board.set_pin_mode_analog_input(pin, differential=5, callback=the_callback)
print('Enter Control-C to quit.')
try:
while True:
time.sleep(1)
except KeyboardInterrupt:
board.shutdown()
sys.exit(0)
#-----( Declare objects )-----
board = telemetrix.Telemetrix()
#-----( Declare Variables )----
#NONE
#-----( Do SETUP Actions once )-----
print('Hello Python World') # to test
#-----( MAIN code block )--------
try:
analog_in(board, ANALOG_PIN)
except KeyboardInterrupt:
board.shutdown()
sys.exit(0)
"""********( THE END )***********"""
Devices supported by Telemetrix4Arduino
- Analog Input
- Analog Output (PWM)
- Digital Input
- Digital Output
- i2c communicationsPrimitives
- Servo Motor Control
- DHT Temperature/Humidity Sensor
- OneWire Temperature Sensors Primitives
- HC-SR04 Sonar Distance Sensor
- SPI Communications Primitives
- Stepper Motor Control (AccelStepper)